In this tutorial I will show you one of the best ways (if not THE best) of sharpening your images. You will need Adobe Photoshop. Version is pretty much irrelevant as long as it supports the high pass filter and blending modes.
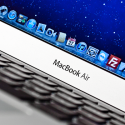
The best way to sharpen the image is to do it right before you export it. Do this on the final size of the image you will be using. For this tutorial I will use my photo of my MacBook Air that you can se above.
step 1: duplicate the layer
Duplicate the layer containing your image. If you have multiple layers merge them (cmd / ctrl + shift + e) and duplicate the layer then (cmd / ctrl + j).

step 2: apply the high pass filter
Now that we have a duplicate of our original layer we will have to apply the hight pass filter. It is located in the menu under Filter > Other > Hight pass. Select it and enter a value around 0.5 px in the radius input box in the filter dialog box.


step 3: change the blending mode
With the filter applied you will see that the image has turned grey and that you can only see come basic shapes from the original image. This is good. The lines indicate the areas that will get sharpened. We just need to set the blending mode of the duplicated layer with the applied filter. To do this select the drop-down menu in the layer palette and select either Hard light or Soft light. You can try something else but these generally give best results.

the final result
Here you can see the final result. Note the sharpness of the icons in the dock and the stars on the background. If you want a more subtle effect you can always lower the opacity of the layer with the filter or apply multiple instances of the filter to get stronger sharpening . To do that just repeat all of the steps on a new copy of the original layer. You will effectively stack the effect and get a stronger effect.

Leave a Reply
You must be logged in to post a comment.